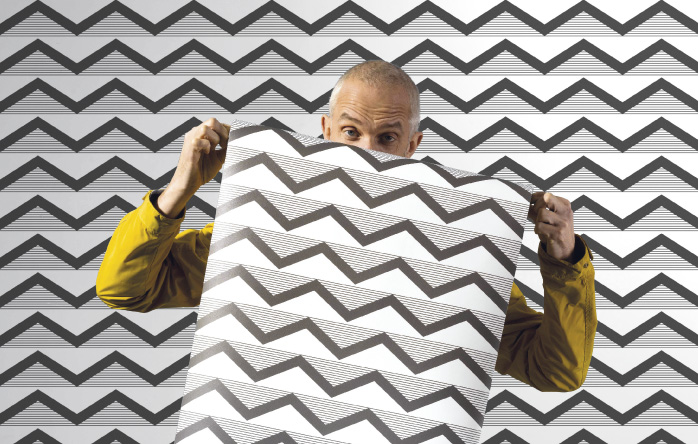
How to paste non-woven wallpaper
To have a perfect looking wallpaper we need a perfect wall. Firstly it should be smooth, flat and without any cracks. Non-woven wallpaper won't hide any irregularities, quite the contrary – it will stick to the wall and emphasize all the imperfections. The wall also has to be clean and dry. Pasted wallpaper has a noticeable strength so it shouldn't be pasted onto layers of old paint or wallpaper, because it would easily peel off.
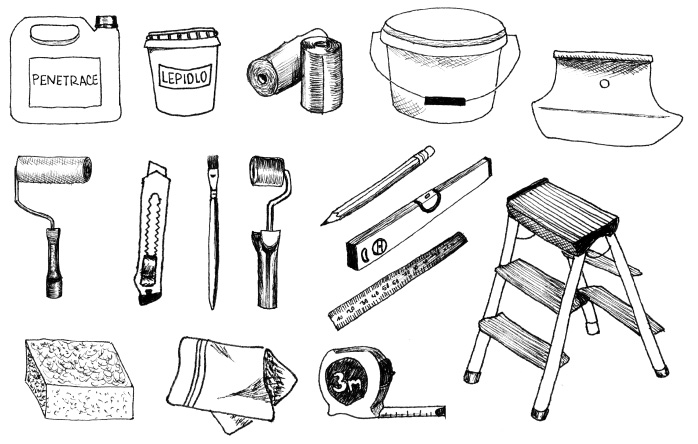
We will need
Undercoat, adhesive, protective foil, container for the adhesive, roller or brush for the adhesive, cutter, smaller brush, small rubber roller, pencil, spirit level, metallic ruler, papering tool, measuring-tape, ladder, soft cloth, sponge.
Hanging guide
To avoid any mess we should first cover the floor with some foil to protect it. We prepare the wall by applying the preliminary layer of undercoat on the whole wall. It will protect the wall from absorbing the moisture, improve the base and absorbability. This will ensure that the wallpaper will stick to the surface evenly and penetration will make it easier to remove the wallpaper in the future, as it prevents the adhesive to soak through the wall. In the hobby markets there are many different kinds and brands of coating products, if not sure which one to choose, we ask the staff for a help.
While the undercoat is getting dry, we check the batch number on the rolls. This number ensures that all the rolls belong to the same series and have identical colors.
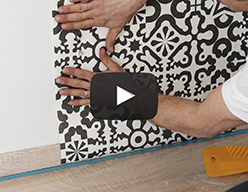
We will start working next to the window. We'll make some marks with a spirit level on the left edge of the area we want to cover. Next we measure the ceiling height and add 5-10 cm up and down as a reserve, then we can cut the first strip. We check the strip with the rest of the roll by placing them side by side if the pattern matches, this way we will also figure out how long the strips should be. We should remember to make them a little longer (10 cm as a reserve) – the overlaps will be cut after the hanging. We then paste the wall evenly with the adhesive – not the whole surface, just the area that will cover the first strip. Then we attach the top of the strip to the wall and paste it along the marks we made. We align the top and bottom of the first length before “smoothing down” the wallpaper, the glue hasn't dried yet, so we can still adjust it to sit in it's place perfectly (that's thanks to the non-woven material qualities and also because we apply the adhesive only on the wall).
With the papering tool we now smooth the wallpaper – proceeding from the middle to the edges – this way we will remove any air bubbles and irregularities. Next we paste the adhesive onto the area where the second strip would be hanged. The strips should be pasted next to each other. We press the adjoining edges of the strips thoroughly with a rubber roller, starting at the top, rolling downwards. The excess glue needs to be removed with a damp sponge and a cloth immediately. Never rub the wallpaper! When pasting the last strip in the corner, we leave a 3-4 cm overlap lengthwise. Then we hang the strip and press it to the corner with the edge of the papering tool. Then we cut away the overlap with the ruler and the cutter. And again, we smooth the border. We then cut away all the overlapping parts on the top and bottom of the whole wall with the ruler and the cutter and we smooth the edges with the papering tool. Then we check all the edges and borders of the pasted strips. For the last adjustments and details we will use a little brush with adhesive and cloth and rubber roller.
Always read the instructions from the manufacturer before you start with the hanging.
Plug socket
If there is a plug socket on our wall, we should turn off the fuses and take off the case so that just the plug's body remains in the wall. We paste the wallpaper normally over the hole. Then we make a cross cut over the hole and carefully start removing the wallpaper with the cutter. We should make the opening in the wallpaper slightly smaller then the case and when we put it back in its place, it will look perfect.
Tolerance
Don't forget that every wallpaper is made with a certain tolerance regarding its pattern regularity, which is caused by the production process technology. So it's not unusual when the pattern matches perfectly under the ceiling but in the lower parts there is a little difference of a few milimetres. Receptive eye will notice, but rest assured that it's ok and usually only you will know about this. That's why good craftsmen adjust the patterns at the eye level.
Drying
Last but not least! For the wallpapers to dry evenly, do not open the windows in the room, do not overheat it and prevent the air blowing through. Otherwise the drying would be uneven and the strips could stick out on the edges.

Jan Slovák
jan@lavmi.cz
Other articles
Wallpapers material

How to calculate the amount of wallpaper I will need?

A short history of wallpaper and other curiosities
 Video tutorial How to paste non-woven wallpaper
 How to paste non-woven wallpaper